This is a multi-step process that will enable you to add data to a webmap, embed the webmap in your own website, and/or view the webmap on your smartphone using the free ESRI app.
Required:
- A free ESRI account
- A shapefile of your study area
Optional:
- A smartphone
- The free ESRI mobile app available through the Apple Store, Android Market or Windows Marketplace
Step 1: Create Map
Sign up for a free ESRI account at www.arcgis.com. Click the ‘Sign In’ link and create an account if you do not already have one.
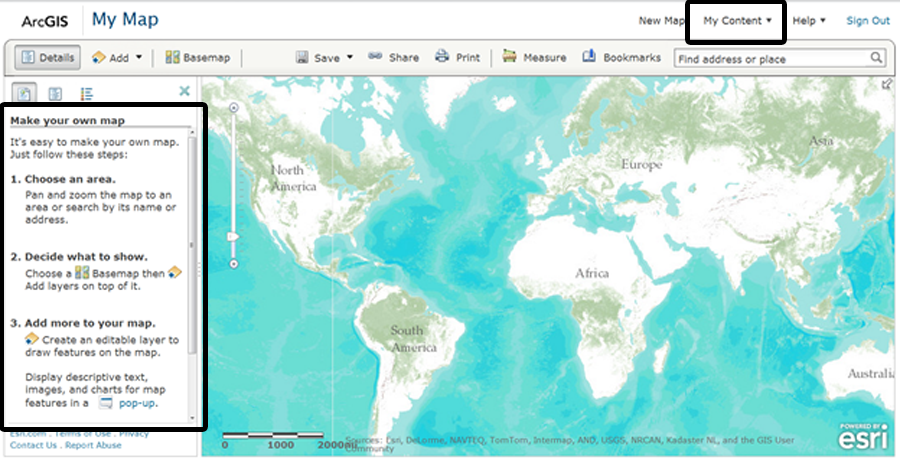
Click the ‘Map’ tab. Once the webmap has loaded, follow the brief instructions in the sidebar: Zoom to your area of interest, select your basemap, and for the purposes of this exercise, save your map. Give it a title, and add tags to allow others to find it. Click the ‘My Content’ tab.
In ‘My Content’, select the checkbox to the left of your new map. The ‘Share’ tab will become active.
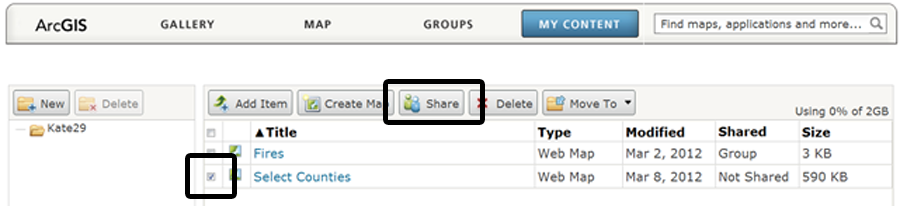
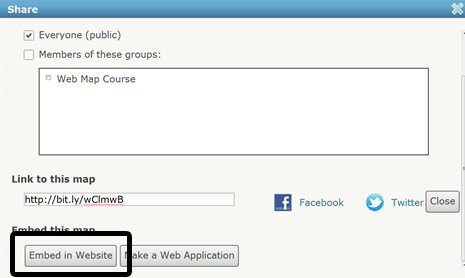
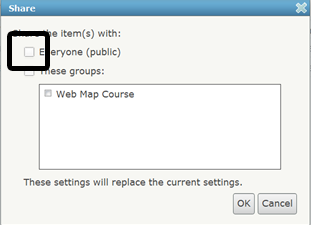 Click ‘Share’ and in the dialog that appears, check the box next to ‘Everyone’. The map will become public once it has been shared. Alternatively, you could create an ArcGIS.com ‘Group’ so that only group members have access. All members must have ESRI accounts.
Step 2: Add Shapefile
In order to add a shapefile to your ArcGIS.com webmap use a program such as 7-Zip to zip your shapefile. Ensure that all of the files which constitute your shapefile are placed on the root of the zipped folder. If you do not have a shapefile, try downloading a TIGER shapefile from the US Census Bureau or a local government website. You may have to clip it first if the shapefile contains over 1000 features. Alternatively, you can drag and drop .csv, .txt, or .gpx files directly into your ArcGIS.com webmap from your computer.

In ‘My Map’ click the ‘Add’ tab and select ‘Add Layer from File’. Navigate to the location of your zipped shapefile and select it.
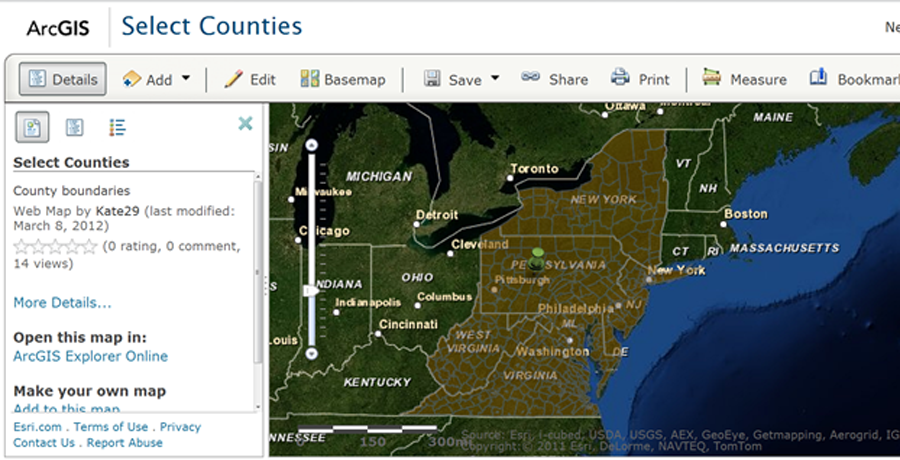
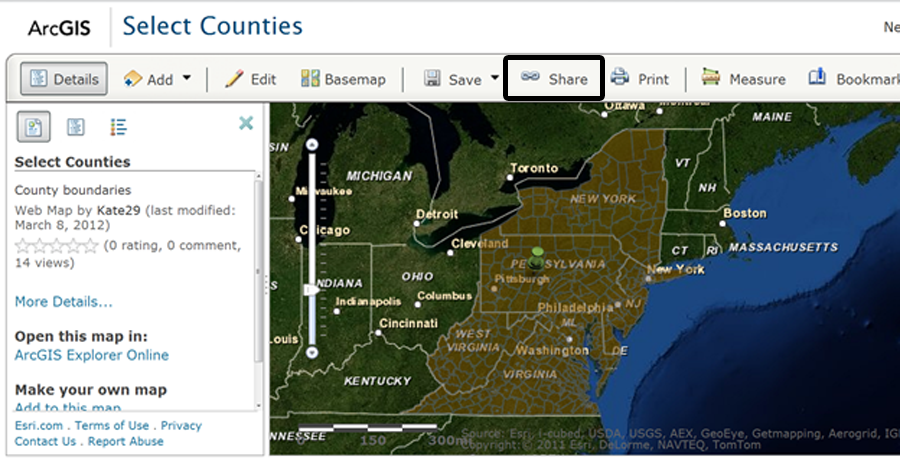
You should see your shapefile displayed in your webmap. Below you will see my county boundaries shapefile in my webmap. Explore ArcGIS.com to discover additional functionality you might like, such as adding points and features.
Step 3: Install free ESRI smartphone application
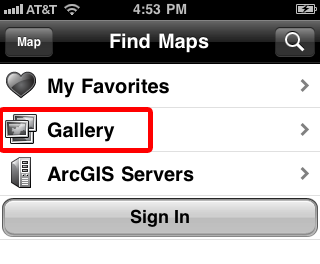 If you have an iPhone, go to the App Store and enter ‘ESRI’ in the search box. Download the free ESRI ArcGIS app. Open the app, and select the map icon. Select ‘Gallery’ and then click the search icon at the top of the Gallery page.
Enter the name of your webmap and scroll until you find it. Select and open your webmap. Explore the application for additional functionality you might like, such as measuring distances.
Step 4: View Data and Embed Webmap in Website
In ArcGIS.com, open your newly created webmap. Click the ‘Share’ tab.
In the dialog that appears, click ‘Embed in Website’.
Copy the HTML and navigate to your website or blog. If you use a popular blog service like Blogger, compose a post and select ‘HTML’. Paste the code into your post where you’d like your map to display.
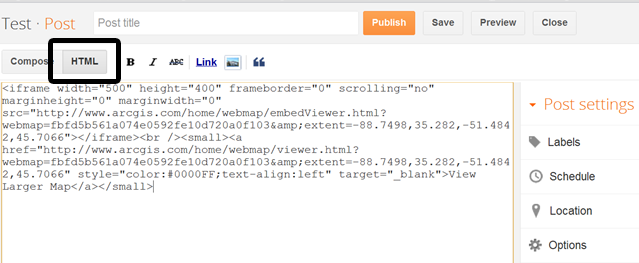
View your blog with your newly embedded ArcGIS.com webmap.


My brother recommended I might like this website. He was totally right. This post truly made my day. You cann’t imagine simply how much time I had spent for this info! Thanks! dbkcgdcecgce